What is the best way to drill the holes for the attachment of the Artiteq wall clips?
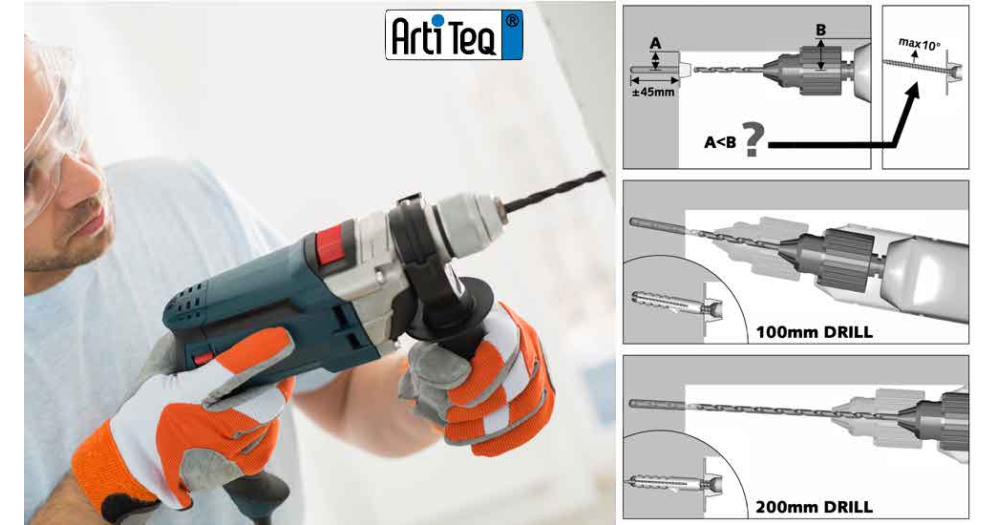
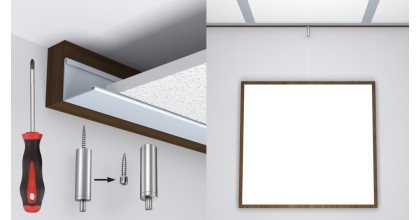
The Click&Connect wall clips must be attached to the wall at least every 40cm, in other words 6 clips per 2 meter rail. If you are mounting several rails next to each other, the last clip must always protrude half way on the right hand side of the rail you are working with, so that the last clip of the first rail becomes also the first clip of the second rail. You proceed further in this way and only the last rail is to be cut to size, on the right-hand side. Finally, the use of an end cap covers any saw marks.
You can mark the holes to be drilled by using the Click&Connect wall clips as a marking template. These clips are made in such a way that the screws can be angled up to 10°, so that the rail can be mounted almost flush with the ceiling.
We then recommend that you use at least a 100mm long drill bit. If this is not sufficient or if you want to drill more straight, it is advisable to use a longer drill bit (say 200mm) or to use a special drill with a compact head.
Finally, to avoid damage to the ceiling, we advise you to place a piece of sturdy cardboard or plastic on top of the drill body, so that you can hold the drill against the ceiling, without damaging the ceiling itself.




Leave your comment